Sunday, February 27, 2011

One Small Step For Man...

One Giant Leap for Weather Station Hacking...

I got my GoodFET circuit board in the mail on Friday.  This was perfect timing: I had all the rest of the parts in-house and my weekend was free.  Time to dig in.

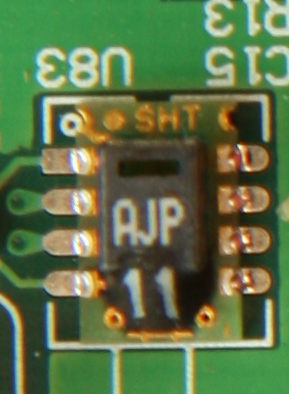
The pin pitch of the processor and USB to serial chip are 0.5mm (i.e. very fine).  Also, the resistors, capacitors, and LEDs are in an 0603 packages.  That mean .06" x .03" in size.  Small stuff.  I remember years ago when electronics started moving to surface mount technology, and how I thought that would spell the end of the people trying to do this stuff at home.  How wrong I was.  Surface mount actually simplifies things in a lot of ways.

Having a pre-fabbed PCB helps a lot, of course.  But you've still got to get the parts soldered on to it.  A lot of people who do this use a technique where parts are placed on the board with solder paste, and then a skillet or a toaster oven is used to "reflow" the solder and make the connection permanent.  I don't have one of those yet, though it is on my list of things to do.  So what to do?

There is a great tutorial on constructing the board by hand at the GoodFET site.  I thought about this technique, but changed it up a bit and went with that described by CuriousInventor instead.  The drag solder method he described sounded easy to do.  So how did I do my first time ever with this technique?
First Time for Everything
I had a board a couple hours later.  Not a great job, but good enough.  The sharp-eyed amongst you will notice my crooked decoupling capacitor above the processor.  Wore yet (you'd think), there is a solder bridge on the bottom right corner of the FTDI chip.  That one is actually there on purpose.  When I was inspecting the board before putting any parts on it, I noticed a small solder bridge between these two pads.  So I got my little scraper thingy and tried to clean it up.  That just took one of the pads right off.  It was at that time that I had a funny feeling in my stomach so I went to check the actual layout.  Sure enough, those two pins were supposed to be connected.  With the one pad now scraped off, the easiest way to do this was just to bridge the pins.

Once that was done, I hooked up the IM-ME to the GoodFET.  I tripped across a couple things before things started working smoothly for me.
  • I was doing this in Arch Linux, and "python" in Arch is actually Python 3.  The two aren't 100% compatible, so I was getting syntax errors.  This meant editing any of the goodfet Python scripts I was going to run, changing the first line from '#!/usr/bin/env python' to '#!/usr/bin/env python2'
  • Any script I was going to run needed a little 'chmod +x ' done to them first.
After that, it was a simple matter of following Travis' instructions to wire up the IM-ME to the GoodFET, erase the memory of the IM-ME, and then put on something else.  The obvious choice was, of course, Michael Ossman's spectrum analyzer code.  The awesomeness of this piece of software cannot be overstated.
Awesomeness
Note a couple things in the picture above.  The first is a chunk of ribbon cable wired into the IM-ME debug connections that terminates in a 14 pin IDC connector on the other end.  This gives me a connection to the GoodFET in just a couple seconds, and it also hints that this Pretty Pink Pager is a force to be reckoned with.

Second thing to notice is the actual spectrum analzyer display.  See the slight rise in signal level on the left?  That is, I believe, the transmissions from the Davis Integrated Sensor Suite!  The picture shows a flat line now, but that is because the IM-ME is in max hold mode.  When first fired up, you see little blips coming up in scattered spots across the left side of the display.  These, I believe, are individual transmissions.  Leave the thing run for long enough, and you get a flat line as all the transmissions join together.

The one thing that is bugging me is that if this is indeed the Davis ISS transmissions, then the frequency shown on the analyzer is incorrect.  The Davis ISS (if I understand things correctly) transmits between 902.5 and 927.5 MHz.  I'm going to take the IM-ME to work tomorrow, generate a carrier at a known frequency, and see if it shows up accurately.  That, and impress the hell out of my friends.

It was really great to get this going. In a few minutes with the GoodFET, I was further ahead than a couple weekends spent trying to get the Bus Pirate to program the IM-ME. But besides that, I now have a development platform that I can start trying my own stuff out on. I plan to start with the spectrum analyzer code and do my own little "Hello World" kind of thing on it. Then I can work toward something that starts picking up the transmissions from the ISS. To do this, I am going to need a better look at how the Davis console configures the radio chip's registers, and that is going to need the Open Logic Sniffer that just shipped from Hong Kong yesterday.

To wrap this up, I wanted to mention just how one Deity or another is trying to slow me down.  I need to be able to run SmartRF Studio to help me sort out the register configurations on the Davis console and figure out the equivalents on the IM-ME.  I already knew that the latest version, SmartRF Studio 7, didn't include support for older chips like the CC1021 in the console.  At Travis' suggestion, I went to try out SmartRF Studio 6 which does have support for this chip.  Unluckily for me, this crashes almost immediately in the 64 bit Windows I have on my laptop.  Sigh.  TI does make the code available for Studio 6, and I could try recompiling it, but I think I'll just set up a VM with XP and run it that way.  Seems a simpler way to go, and I won't have to switch back and forth between Linux and Windows all the time

Things are starting to get interesting...

Wednesday, February 23, 2011

Circuit Board pr0n

Just a quick post tonight for someone who asked how hard it would be to rework the expansion connector on the Davis VP2 console to match an XBee module pinout.
We're talking that 2x10 Through Hole Bad Boy to the Left...
Answer: Hard.

Monday, February 21, 2011

Davis Weather Station Wireless Sniffing: A Start

My last post discussed my dismal failure to get my Bus Pirate to take control of my IM-ME pretty pink pager. That battle has been lost, but the war is only beginning. I have a box of newly arrived electronic components sitting on my kitchen counter. Once I get my GoodFET circuit board in the mail (hopefully this week), the battle will begin anew. Reinforcements are en-route in the form of the Open Workbench Logic Sniffer that I have on the way. This is a $50 logic analyzer that is extremely capable, thanks to some recent updates to its firmware and GUI client. Unfortunately, I am once again at the mercy of the glacial shipping out of Hong Kong. I hope to see this in my lifetime.
A Can of Electronic Whoop-Ass
Why do I need a logic analyzer? First, I'm firmly convinced that everyone needs a logic analyzer. Second, I need to understand how the Davis firmware is configuring the CC1021 RF chip in the console. That way I can replicate the configuration in the Pretty Pink Pager and hopefully grab the wireless transmissions from the ISS.

My initial understanding is that the Davis firmware does an initial full-blown configuration of the RF chip on reset, and then does a smaller configuration each time it goes to read the ISS every 2.5 seconds.  Why would I suspect this?  I dunno.  Just a hunch.
More Interesting Than You Think - Keep Reading
The CC1021 configuration is done via a conventional SPI interface. I thought I could just use my Bus Pirate to sniff the SPI interface, but that doesn't seem to work. SPI sniffing from its interactive GUI gave me data that didn't make sense, and the binary SPI sniffing utility doesn't work at all. Drat.

So with some time on my hands (and it being -37C the morning I did this), I hooked up my scope to the expansion connector on the console and took a look. I put one channel on SCK and the other on MOSI (go here to find out what I'm talking about). As one would expect, the timing between each command per 2.5 second interval was very regular: it has to be if it wants to stay synced with the ISS transmission.   I was able to use my scope's trigger delay to look at each config command and associated data byte as explained in the datasheet.
Before getting too far, I should note that the CC1021 register configuration (gain control, frequency settings, etc) are controlled over a different interface from the actual data that goes back and forth.  I forgot that once and felt pretty dumb about it.  The data interface isn't available at the expansion connector, but the SPI interface is.  Of course I can use the STRMON command to the console to see the data coming back (or at least some of it - not sure about that yet).
After hooking up to the console, I waited for the asterisk on the LCD (indicating reception) to go away, and then triggered the scope.  This way I knew I was triggering in the dead-time between ISS transmissions and I'd get the start of an ISS transmission every time.  The scope display gave me SPI clock and data, and it was easy to read the binary 1's and 0's to the CC1021 and turn that into hex. After I got one command figured out, I adjusted the trigger holdoff until the next command showed up. Lather. Rinse. Repeat. Here is what I got:


Some things to note:
  • the values for FREQ_2A, 1A, and 0A change each round because this system does the Frequency Hopped Spread Spectrum thing that scares so many people off.  There are 51 frequencies (see below) that it hops between.  You can bring up a debugging screen on the console (described in the manual) that shows the index of the hop.  Neat.
  • timing gets a little variable at the end so that last AFC command might be a duplicate.  When my real logic analyzer shows up, I'll know for sure.
What is bugging me right now is that I haven't been able to find the hopping sequence in the firmware.  I sniffed consecutive writes of one of the FREQ registers, as well as consecutive writes of FREQ_2A, 1A, and 0A.  I had suspected these to be in an array in the firmware in one form or another, but no luck so far.  I'll poke around a little more, or use brute force once the logic analyzer arrives.  Either way, this is something I'll need to know if I'm going to try to attempt to build a compatible receiver.

Another items of interest.  TheVantage Vue Test Results are a great find. Click on the Test Report link and look on Page 28 if you want to see the frequencies this thing hops across. Lots of other good spectrum displays for things like occupied bandwidth and the like.

Now lets bring things full circle. Near the start of this blog post, I showed a screenshot out of a hex editor in the Davis FLASH.BIN firmware that runs the console. See the first four words there? If I type "main interface reset sequencing" into Google, I get a very interesting link to a guy who coded up some stuff for an amateur satellite link that used a minor variant of the CC1021 chip used in the Davis console.  Also interesting is that his work is labelled as being under the GNU General Public License, which means that the source code  has to be made available upon request if copied and distributed.  Now I'm certainly not accusing Davis of violating the GPL.  It is much more likely that there is a common source to a recommended configuration of this chip that I need to track down yet.  Gotta keep digging.

Sunday, February 13, 2011

Fail Blog

I threw in the towel today.  I've spent the last couple of weekends trying to get my Bus Pirate to interface to the IM-ME.  I got no further this week than I did last week.  After a reset, the first command to Get Chip ID always works.  After that, nothing works until I reset it again.  I know that the lock bits are erased, or Get Chip ID wouldn't work in the first place.  I've used my scope to stare at the data going back and forth.  I've rewritten the code three times to send and receive the data in different ways.  I've driven the IM-ME via a resistor divider network and Vcc instead of the Bus Pirate's Vpu.  I've scoured the GoodFET source code (more about this in a second) to try and find something I'm doing differently.  And the result is always the same.  Unfortunately I am not the first to have problems with this combination, and I doubt I'll be the last.  But if anyone ever does get this working, I'd love to hear about it.  Drop me a comment if you want the code I've worked up so far.  It is written in Python and uses PyBusPirateLite and PySerial.

There must be a way.  And indeed there is.  It seems all the folks into IM-ME hacking have got themselves a GoodFET.
IM-ME Hacking Done Right
This thing is like a hacker Swiss Army knife.  Lots of capabilities and under active development.  And Travis Goodspeed, the neighborly fellow who designed this thing, sells a bare PCB for a song.  So I'm going to put the IM-ME hacking on hold for a bit while I gather up the parts to build one of these things.  In the meantime, I can always try to sniff the comms between the processor in the Davis console and the radio chip, or finish reverse engineering the Davis Talk protocol.  I just hope my wife's patience continues to hold.

When people ask me on Mondays what I did all weekend, I just say "I took it pretty easy." It is less complicated that way.

Tuesday, February 8, 2011

We Are Experiencing Technical Difficulties Beyond Our Control...

Please Stand By.  These are the words I'd hear when my local TV station would lose the feed of Starsky and Hutch, or whatever it was they were supposed to be showing, and show the logo of the TV station instead.

I'm going through a bit of that right now myself.  I spent the weekend trying to get my Bus Pirate talking to the IM-ME.  I wrote a schwack of Python code, studied the docs at Dangerous Prototypes, and thought I was there.  But I found I had a problem.

After a reset, the first command to Get Status always works.  After that, nothing works.  I look on the scope and the command is going out properly, but the response is (usually) always high, or 0xFF.  I tried just about everything I could think of, and now I am starting to suspect the Bus Pirate itself.  I'm finding that some of the commands to set a control line high or low stop working after I read back a byte.  It is like they are stuck.  I need to make sure I can reproduce this, file a bug, and see if I can get a fix.

Stay tuned.

Friday, February 4, 2011

Busy weekend coming up

The good news is that I didn't have to bring home any work to get through this weekend so that should leave me with a decent amount of time to hack the IM-ME.  Before getting into that, here is a little tidbit that has pretty much nothing to do with the hacking of the console.  Compare this:
Console Temperature & Humidity Sensor
with this:

Sensirion SHT 11

I'd say we have a match. AJP & A5Z are just lot codes according to the datasheet.  Follow this link to find the details of the Sensirion SHT11 sensor used in the console, and this link to the datasheet.  I have a sneaking suspicion that the ISS uses the same sensor, but I'm not about to tear it apart to find out.  It would make sense though.  The measly -40C bottom end of the outdoor unit matches the lower limit of this chip.  Grrxyn left a comment on an earlier post noting that the Davis design doesn't follow the datasheets recommendation of thermally isolating the sensor from the main circuit board.  So if your console seems to be reading a bit hot, now you know why.